
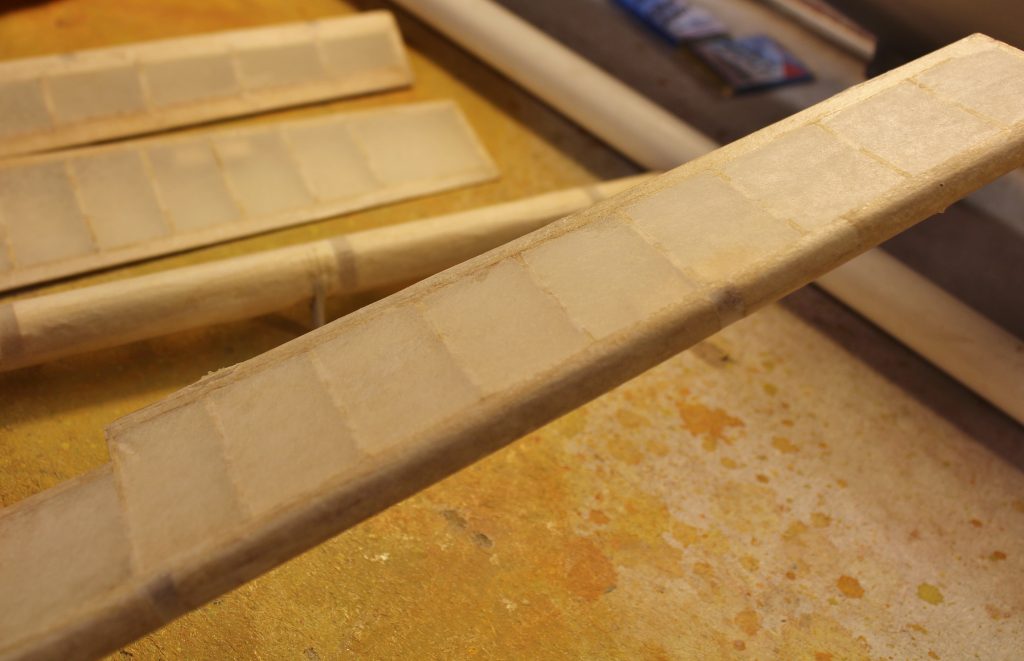
Last time we devoted a lot of attention to “plastic stuff”…windows and turrets. Those details are now in place and securely masked off, ready for painting (which is coming soon). Several series back I also mentioned getting some covering onto the control surfaces…elevator, rudder and ailerons…which are indeed the only “open” structure on a B-17. That’s what we’re going to start with this time around. In the past I have shared my opinions on the many different types of “fabric” covering …stuff that comes in sheets or on rolls that we use to over/close/seal “open” structure (ribs, stringers, etc., without sheet covering). If you have been following along you already know that I prefer not to use one-step, iron-on coverings…plastic films etc. With that said I’ll also repeat my advice that this B-17 won’t mind at all if you use one or another of these popular products. I’m going to uses silkspan…a heavy, wet-strength variety of tissue…because I like it. If that’s not you choice, follow along and apply your own favorite covering in its place. As often as not using traditional covering materials like silkspan is referred to as “silkspan (or tissue or silk)-and-dope” . Regardless of how well it may work, however, the inescapable truth is that DOPE SMELLS. This is a problem for a lot of people, and one good reason that lots of us can’t use it. But…now we have the choice of a new product that does all the things we need dope to do, and DOES NOT SMELL. You’re already familiar with Deluxe Materials as the source of my glass cloth, EzeKote medium, SuperPhatic glue and so on. Deluxe also sells EzeDope. Check it out at:
then follow along as I use some.
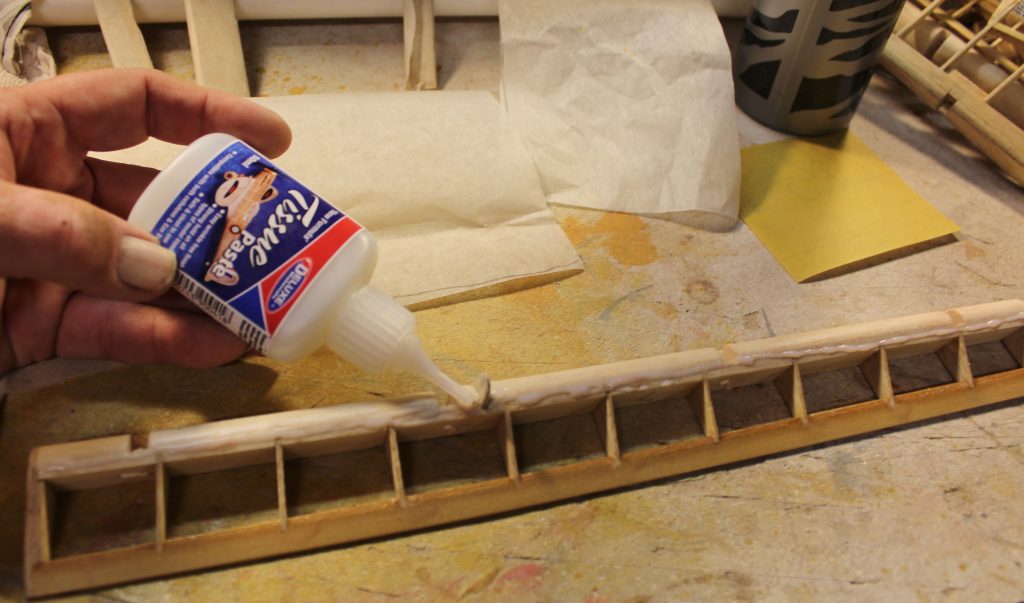
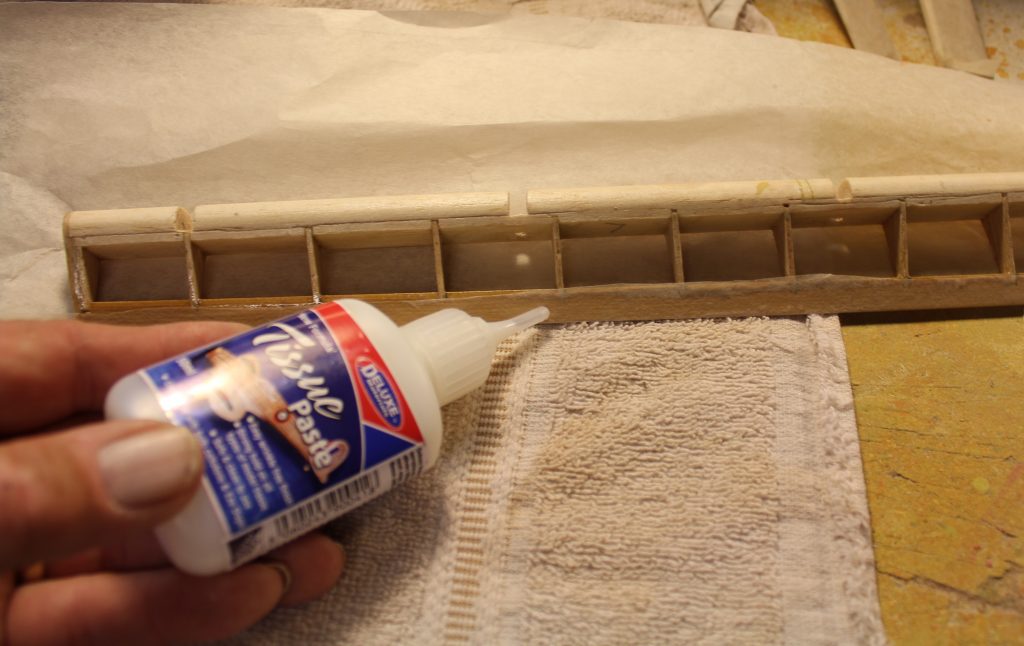
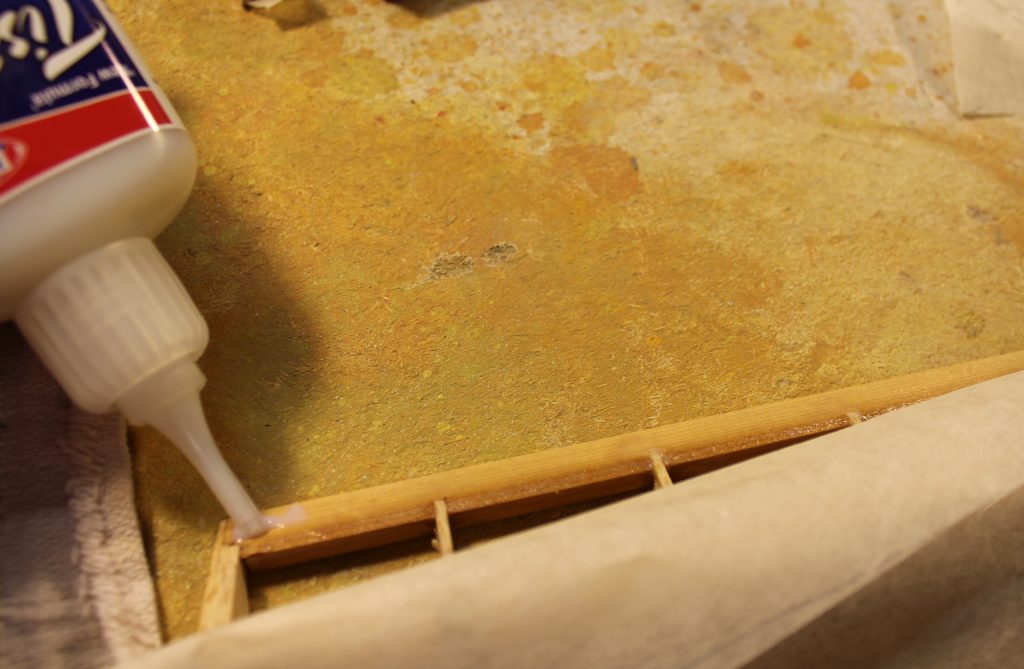
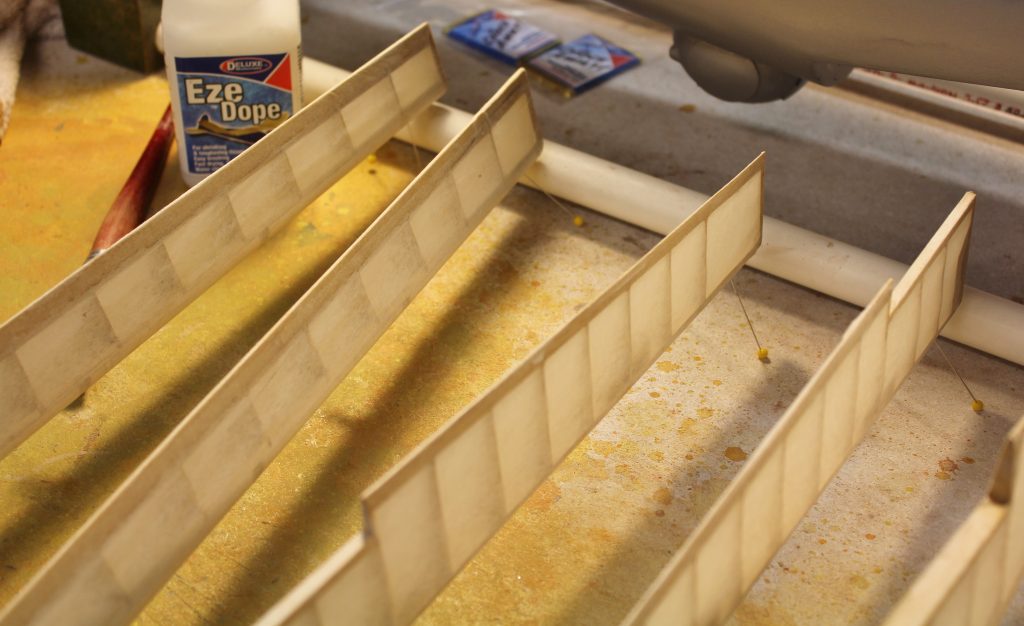
B-17-23-1 What’s happening here is that I’m using a companion product to EzeDope called Deluxe Materials Tissue Paste. Check it out along with EzeDope online. What I can tell you right here is that if you use paper-based coverings of any kind, you NEED to know about Tissue Paste. In this shot I’m laying a generous bead of it all along the leading edge of one of the ailerons. Straight out of the bottle like this is the way I’ll suggest you apply it.
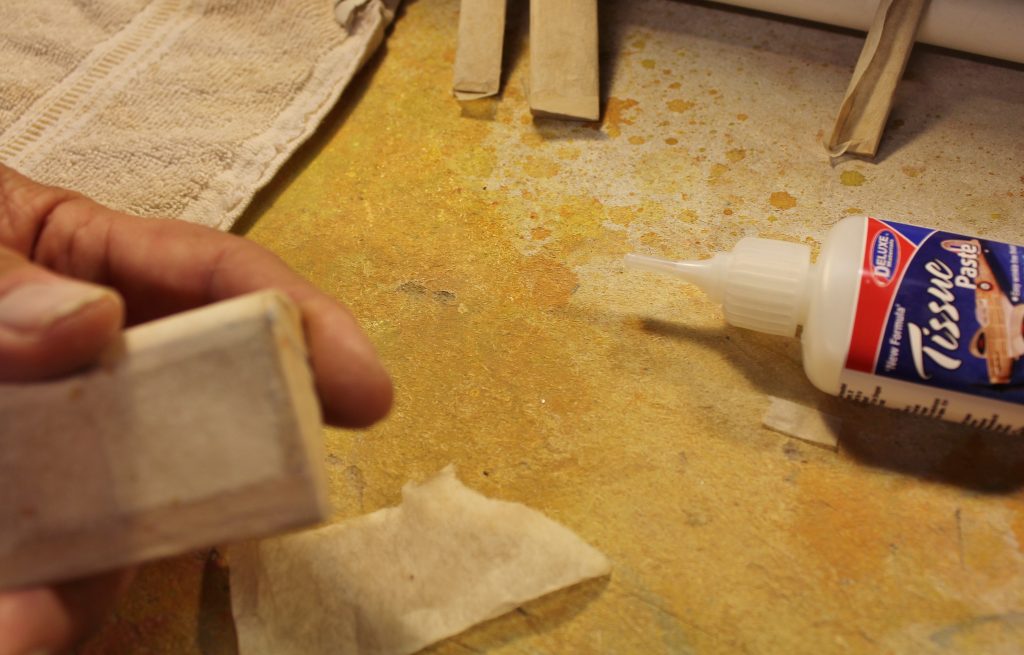
B-17-23-2 What comes next is that you get up close and personal with it. I’m using one finger to spread that bead out into a generous, even coat across the entire area you want your covering to stick to. Can you see the cut-out sections of silkspan in the background, ready to apply?
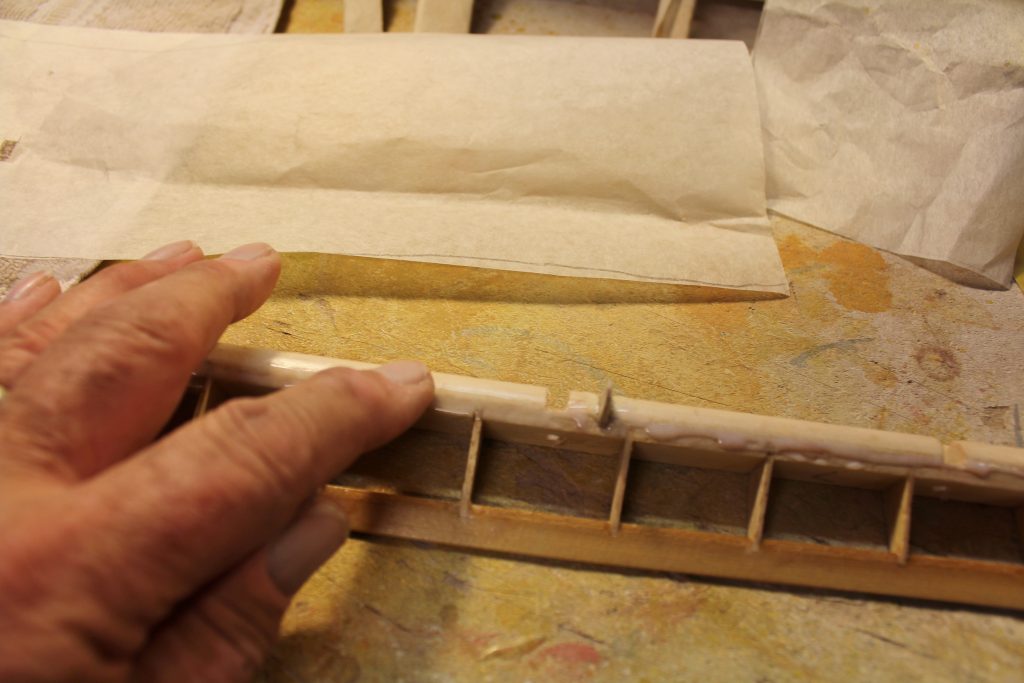
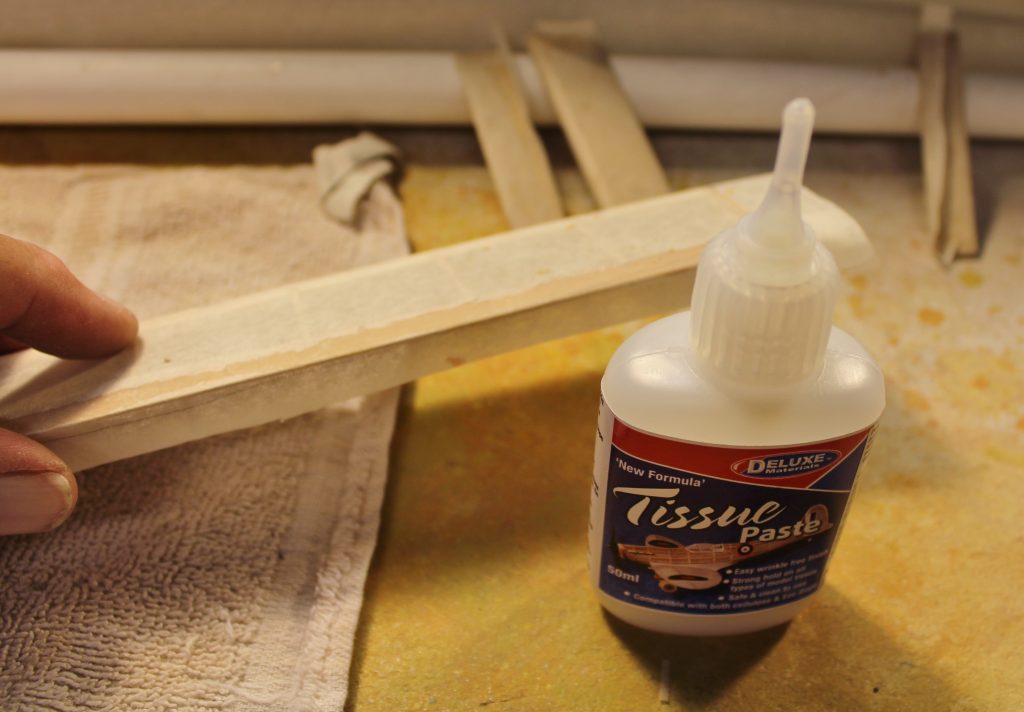
B-17-23-3 Now comes the good part…because Tissue Paste is water based it instantly softens and relaxes any kind of tissue covering it comes in contact with. (Dope will not do this) What you see here is one edge of a piece of silkspan that’s laying against the back side of the aileron as I fold it over and press it into place along the opposite (front) face of the trailing edge. Overlapping edge seams like this is standard practice with any covering. What happens now is that as you fold and press it into contact with the Tissue Paste, IT JUST STAYS THERE.
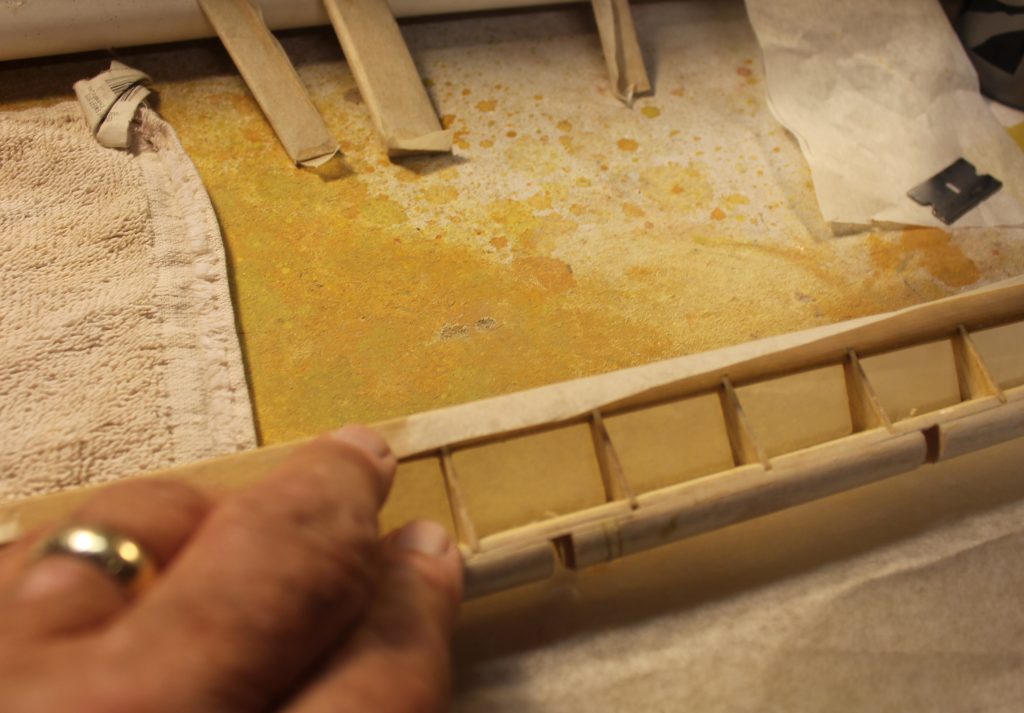
B-17-23-4 See how the silkspan stays attached along the leading edge (Yes, this is a different step in the covering sequence) while I apply a new bead of Tissue Paste to the corresponding trailing edge surface?
B-17-23-5 Same deal on the other aileron. I have the covering attached safely along the leading edge which is out of sight behind it while I do the Tissue Paste thing again on the trailing edge.
B-17-23-6 The end flaps lie down neatly for this stuff as well. I trimmed the excess length of covering and folded it over and around the tip (just as I would have with dope) and it STAYS STUCK without my having to go back and fuss with it.
B-17-23-7 Here’s another control surface all covered, with the Tissue Paste still moist. See how well it stays put?
B-17-23-8 Once the Tissue Paste has dried completely…you can tell by touching it to see whether it no longer feels cool…the next step will be to water shrink all the silkspan tight. Once everything is dry (again) we can clean up all those loose edges.
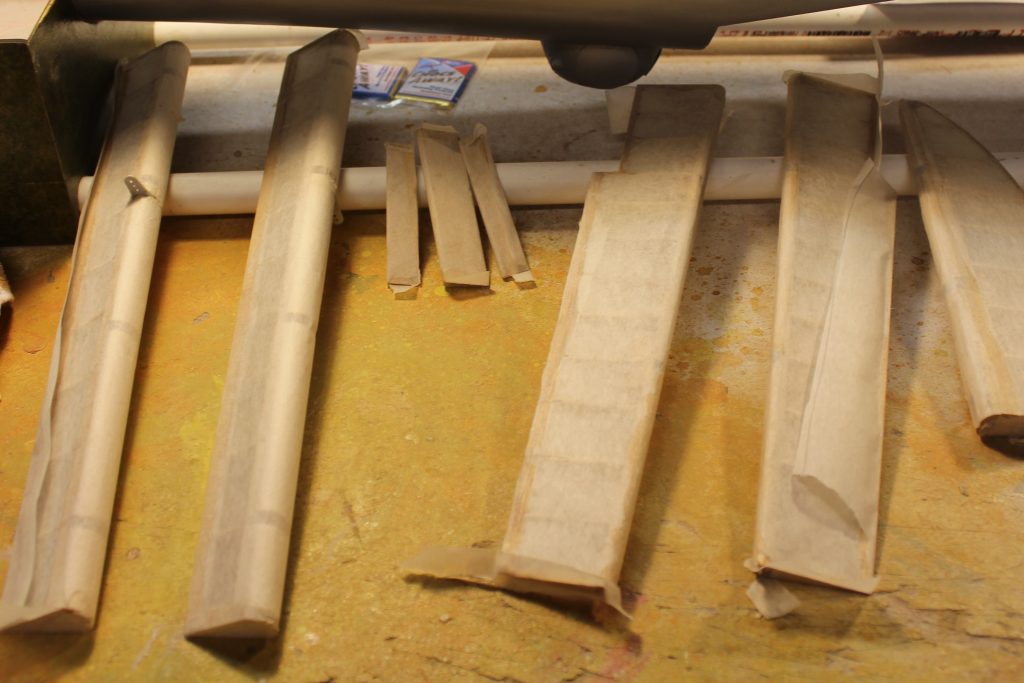
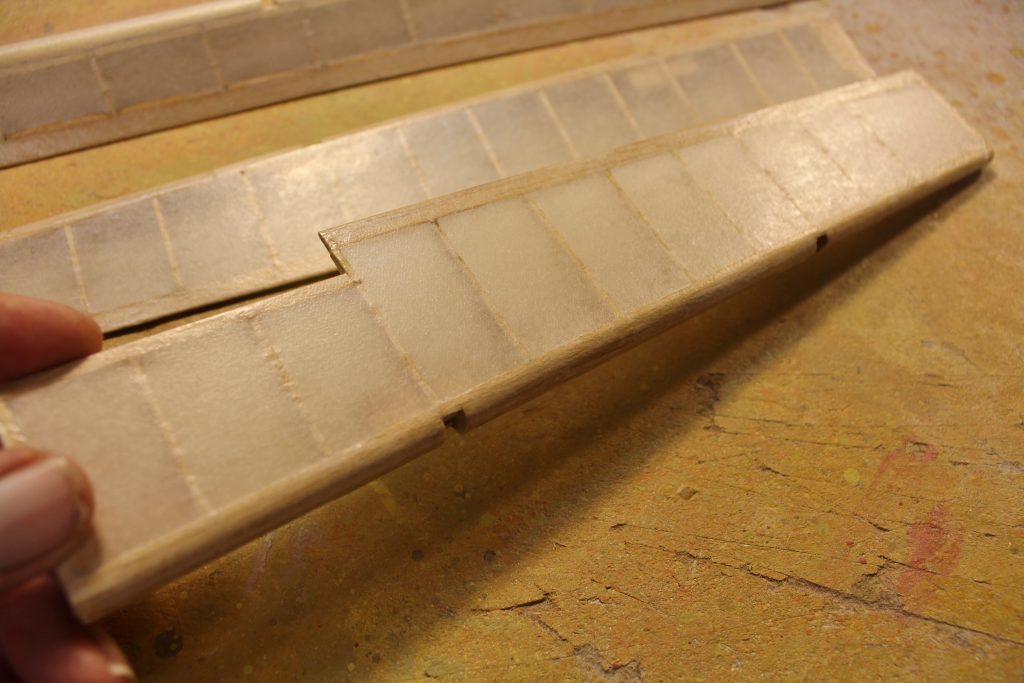
B-17-23-9 In earlier articles I have described the process of trimming silkspan using both fine sandpaper and a sharp blade. Our control surfaces look like this after being trimmed.
B-17-23-10 Here’s where one of the big differences using Deluxe Materials products comes in. Can you see the faint shine on all these tight, smooth silkspan-covered surfaces? That’s the result of my putting on the one coat of EzeDope you see in the background, thinned slightly with water according to the directions on the bottle. The big deal is that while all this is going on there is no smell from the EzeDope. The silkspan will go slightly slack as you apply the EzeDope, but as you can see it tightens just fine when it dries.
B-17-23-11 As that first coat of EzeDope dries it will raise a few “fuzzies” and a few loose edges you missed. An easy once-over with 320-grit production paper will get it ready for a second coat of EzeDope. Here’s what that looks like when the second coat is dry. Can you see the increased sheen of the fully-sealed silkspan?

B-17-23-12 Once the control surfaces are covered and sealed (“doped”) I’ll set them aside until it’s time for a couple of coats of sanding primer to prepare for the final application of color. While they wait I’ll start some catch-up work like finally getting around to installing the rudder and elevator servos in the fuselage. What you see here is the pair of ¼” x ½” spruce servo mounting rails that are already in place, spaced to fit my servos, as well as the ends of the carbon fiber tube rudder and elevator pushrods hiding in the shadows at the left. Once both servos are mounted I’ll fit 2-26 threaded rods and clevises to connect them to both servo output arms. (Yeah, I know you’d like to see a picture of the finished servo set-up, but in the excitement of getting to this point I forgot to take it and got involved in the next steps. I’ll try to include one for you later.)
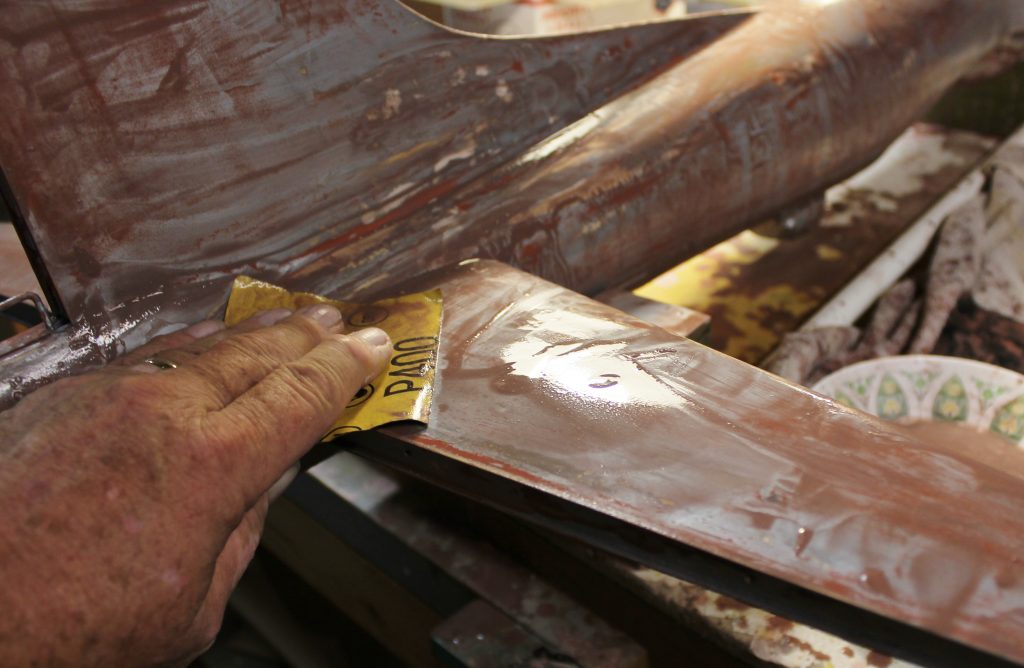
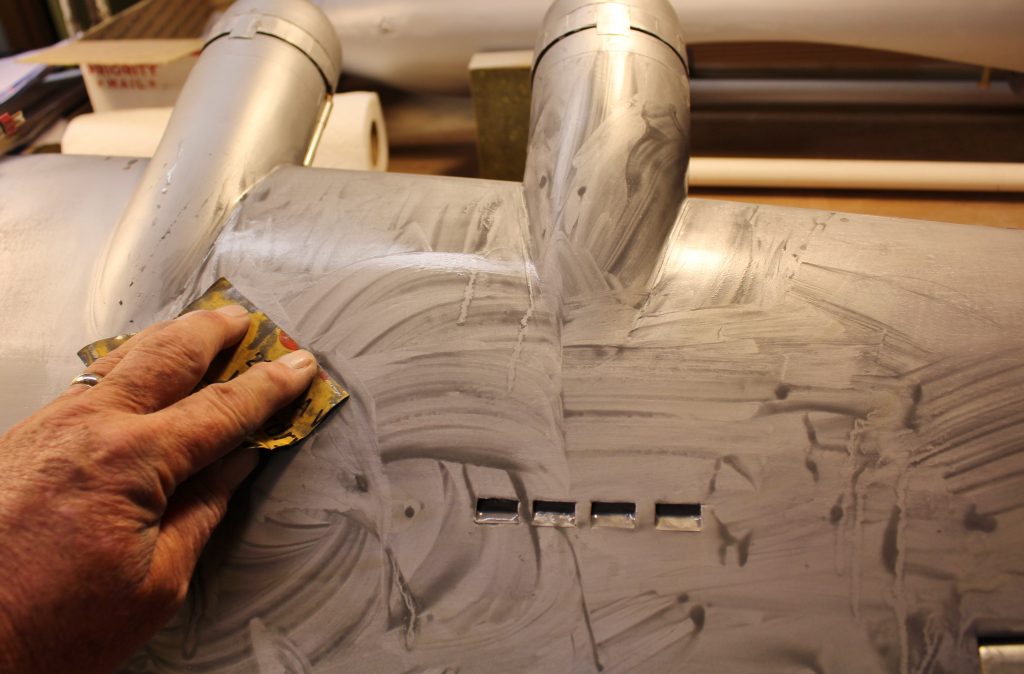
B-17-23-13 Remember how I’ve been suggesting all along that there’s always time for more sanding? I put that most recent coat of Stits PolySpray on a bit thick/heavy in anticipation of this part. Here I am sanding aggressively with 400-grit wet-or-dry paper. As you can see I believe in keeping it good and wet…this helps “float off” all the paint/primer residue that’s trying to clog up the sandpaper.
B-17-23-14 All wiped clean and dry, you could say the sanded-out surface of successive layers of primer and auto body putty look doesn’t look like much of an improvement. Watch what comes next.
B-17-23-15 I sprayed yet another wet coat of Poly Spray over the entire airplane. When I sanded THAT primer out with more 400-grit wet-or-dry, look how smooth and even the resulting surface came out.
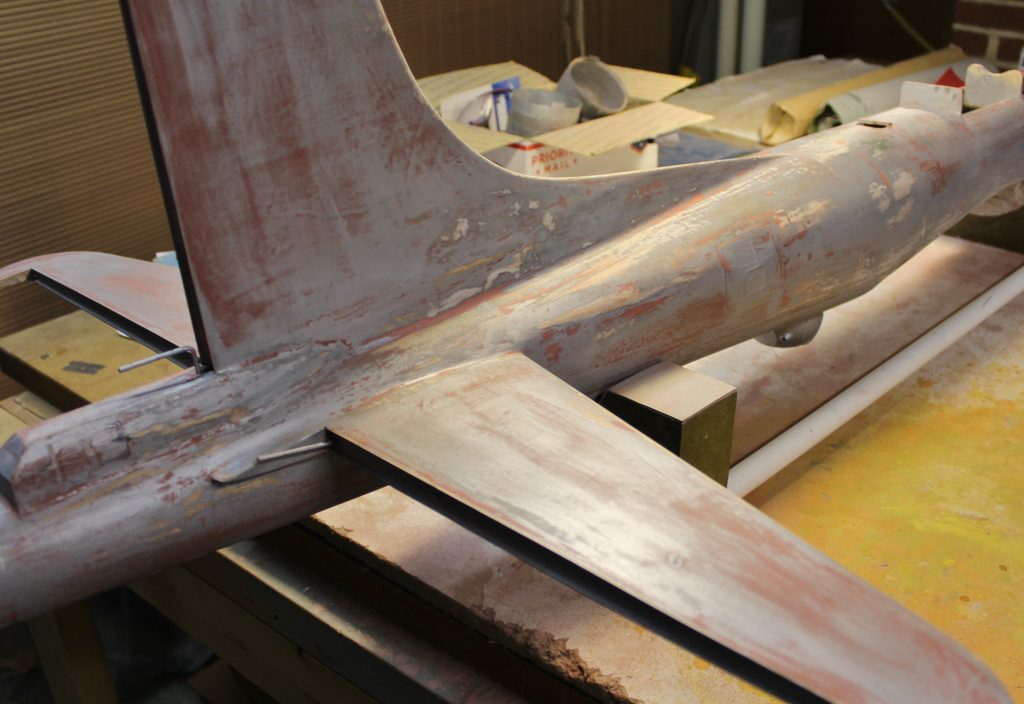
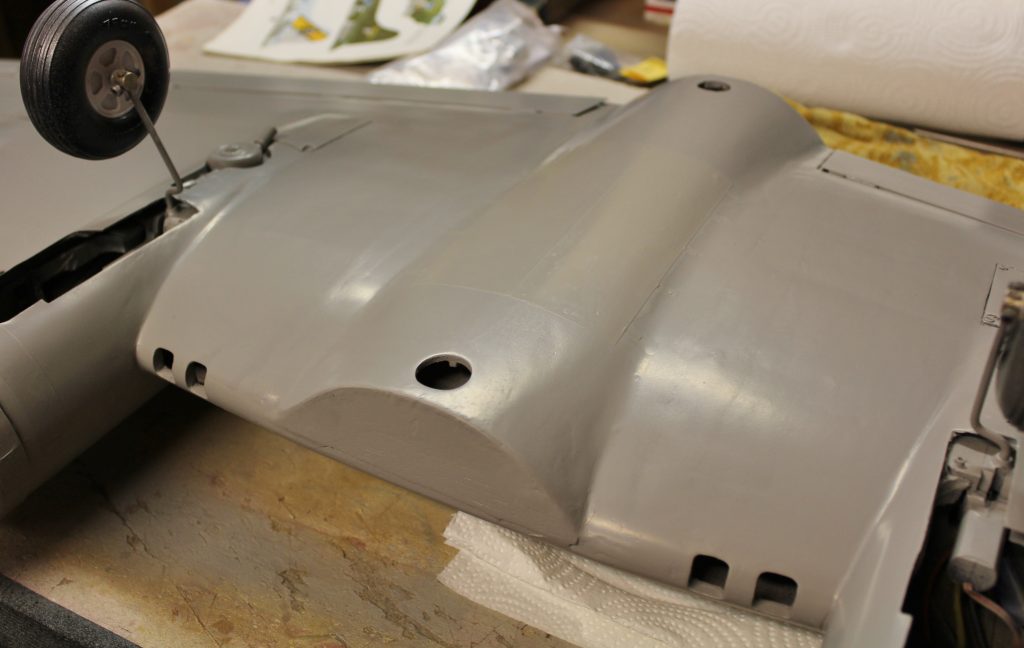
B-17-23-16 With that layer of Poly Spray sanded out and cleaned up, the surface of the airplane looked like this. At this point I want all the disparate parts of the airplane to get uniform treatment regarding any final priming and sanding prior to painting so I have gone ahead and permanently installed the control surface hinges we talked about earlier. This is the right aileron as seen from the underside.
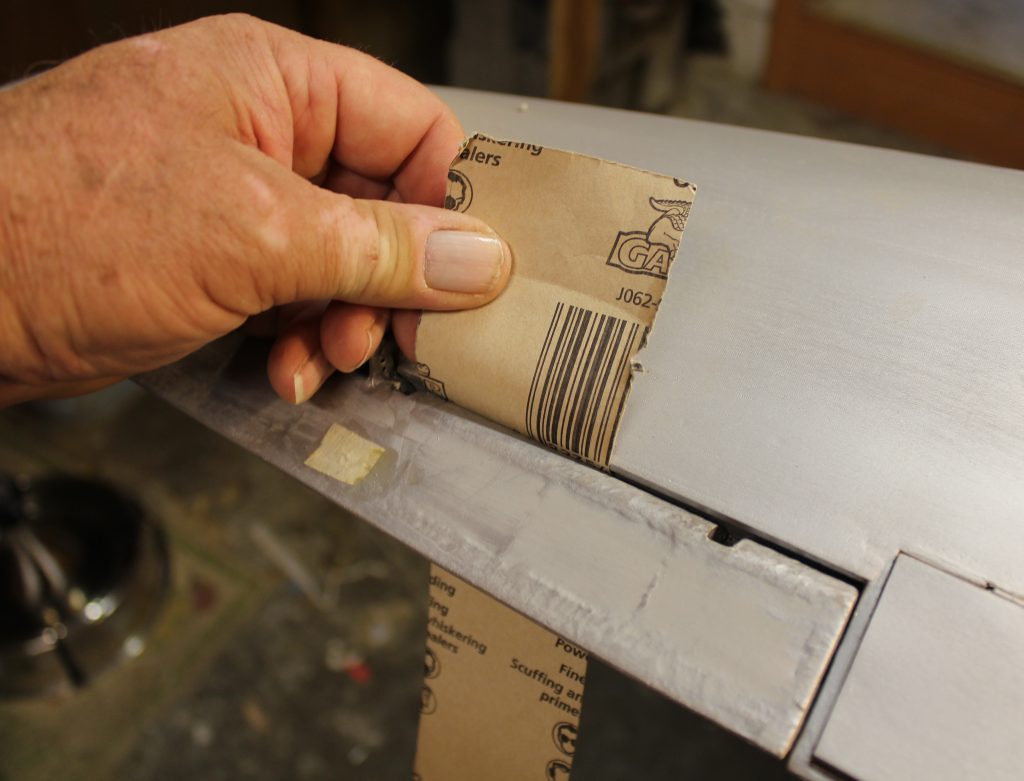
B-17-23-17 More sanding of a different kind. There are nearly always “tight spots” in the control surface gaps. My favorite way to deal with them is some careful dry sanding starting with 220-grit paper BETWEEN the surfaces. If you pay attention while you are doing this, you’ll be able to feel when the sandpaper encounters the too-tight clearances and cuts through them. Remember that when you get to this point, all the control surfaces have to move freely before you go any further.
B-17-23-18 Here’s another look at the entire wing all primed, sanded and assembled, nearly ready for some color.
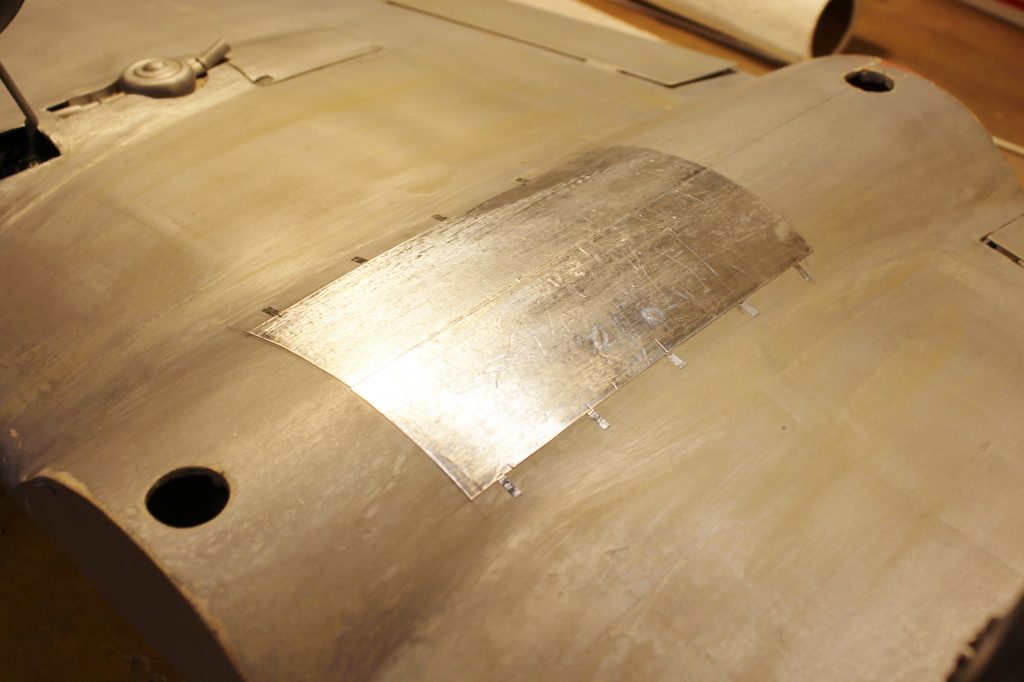
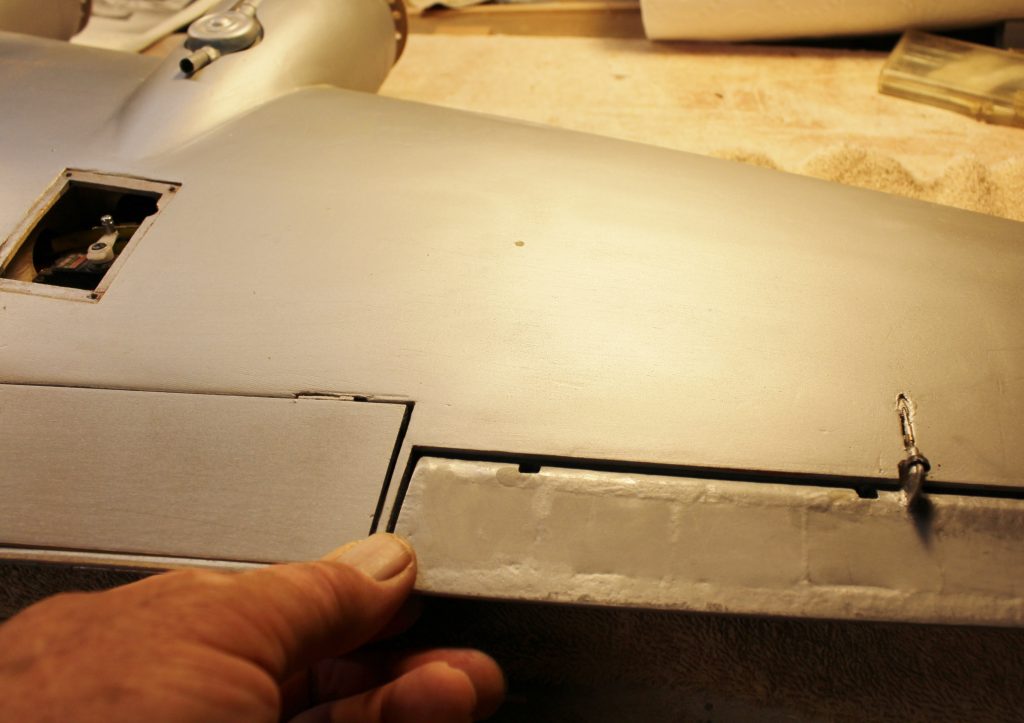
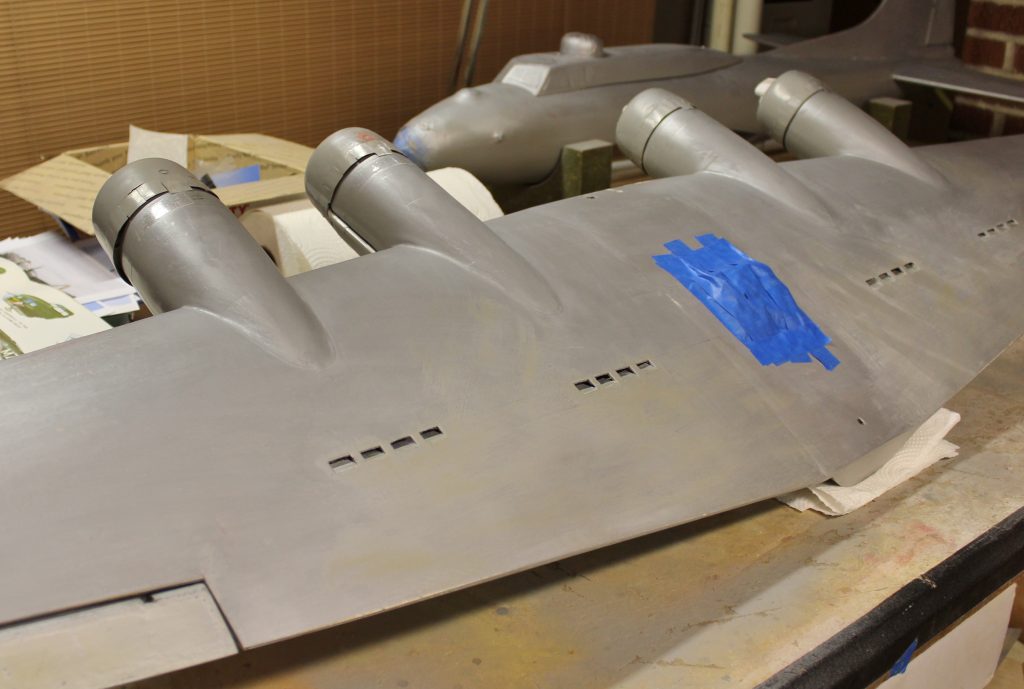
B-17-23-19 You can discover an almost endless series of skin overlaps, access panels and other sheet-metal-deep features on a B-17, but as we have discussed already this relatively small model is not the ideal place to attempt to reproduce all of them. However…the bomb bay doors cry out for acknowledgement, so I indicated their presence with a couple of pieces of that adhesive backed aluminum tape I used before. When the underside of the airplane is painted camo gray, the outlines of this door assembly will be just visible enough to remind you of why B-17’s existed in the first place.

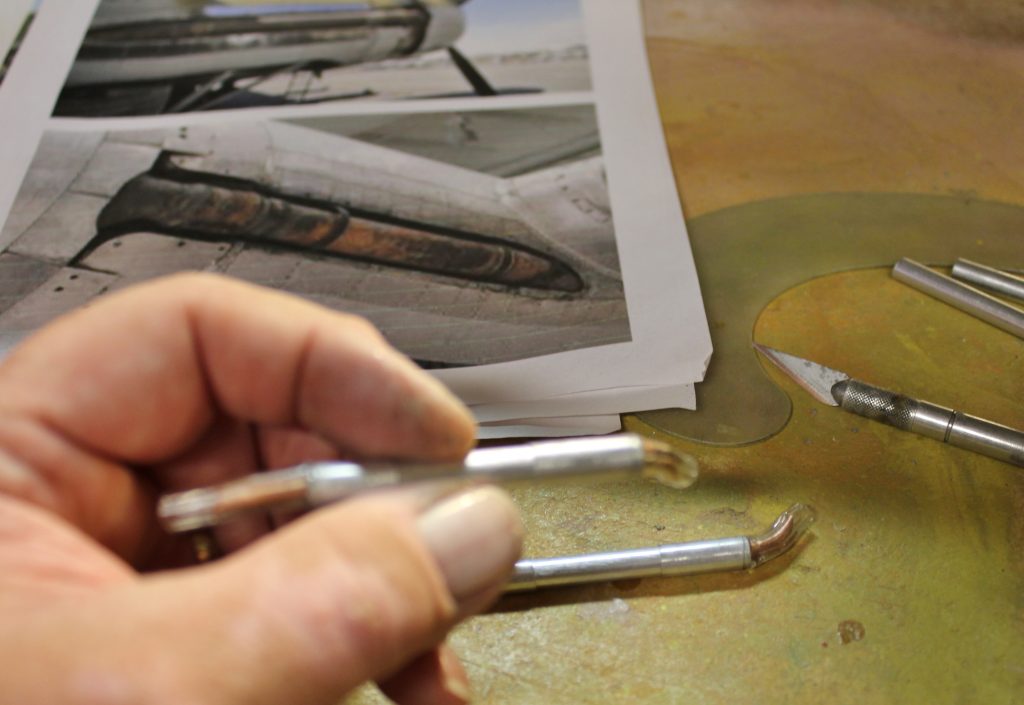
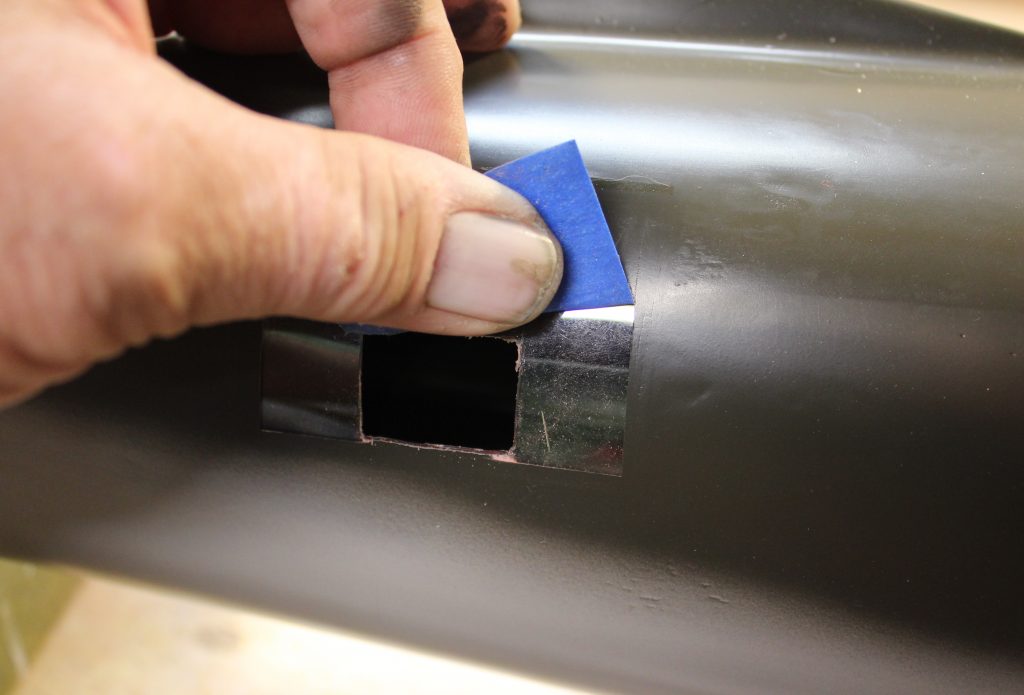
B-17-23-20 Several shop sessions back I described using the lightweight plastic supercharger moldings as the basis of a set of four more completely detailed units. At that time I explained that the two inboard superchargers look different from the outboards…they appear shorter, but because they include as exhaust pipe extension to clear the landing gear in the No. 2 and 3 nacelles they are actually longer. The extra part shows up on the outboard side of each of those nacelles and that’s what we’re going to work on now. My first step was to use those same old scale references to determine the shape and placement of the basic cutouts that must be made in each nacelle. You can see how I drew in the outline of the exhaust bypass opening. Now I’m using a No.11 blade to make the actual cutout.
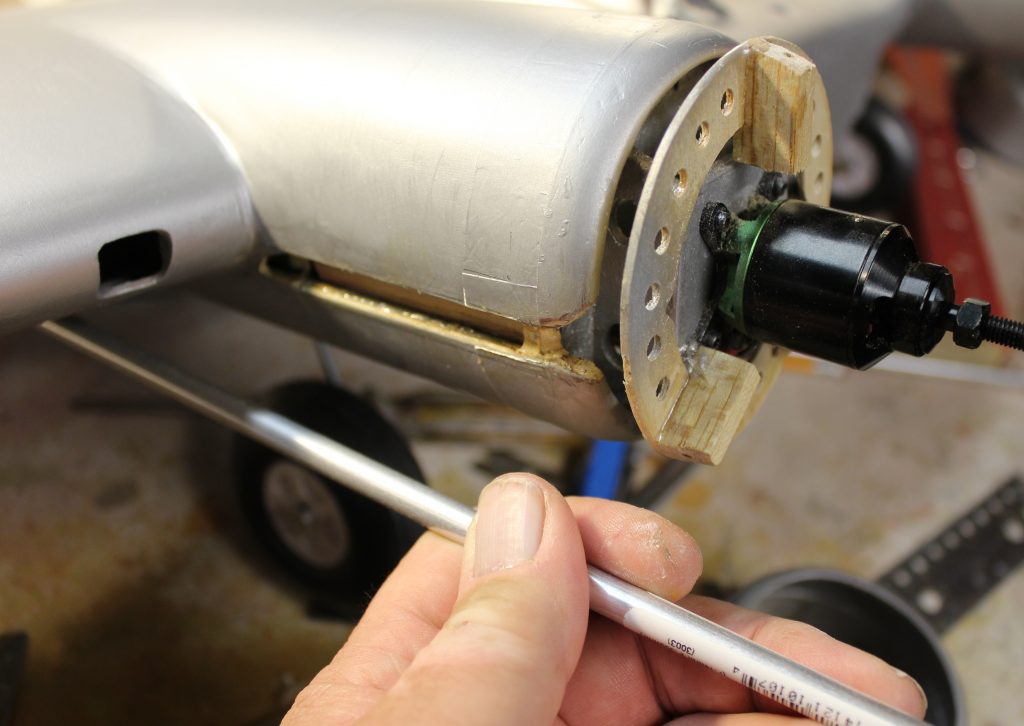
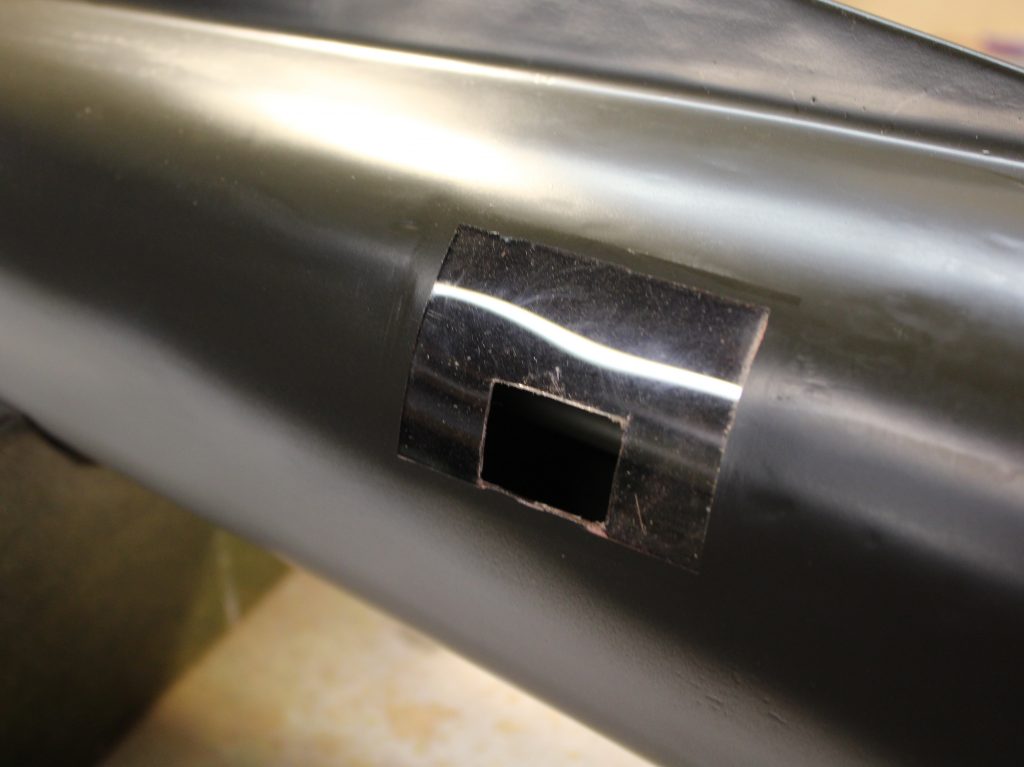
B-17-23-21 The “raw” cutout looks like this. I’m going to cut the base/core exhaust bypasses from this length of 3/16” diameter aluminum tube.
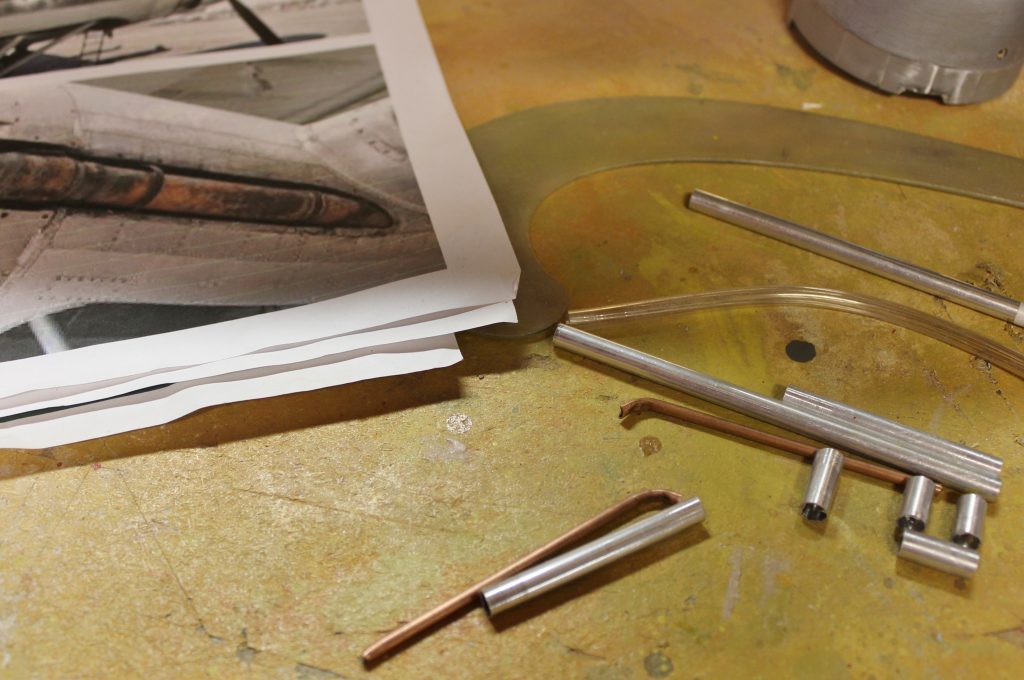
B-17-23-22 If you look closely at the reference photo you can see how the exhaust housings “bend” at the front. Because it can be difficult to bend that aluminum tube accurately I chose to use short pieces of flexible model airplane fuel line. Those pre-bent copper wire inserts will hold the required bend in each piece.
B-17-23-23 Those pieces go together like this.
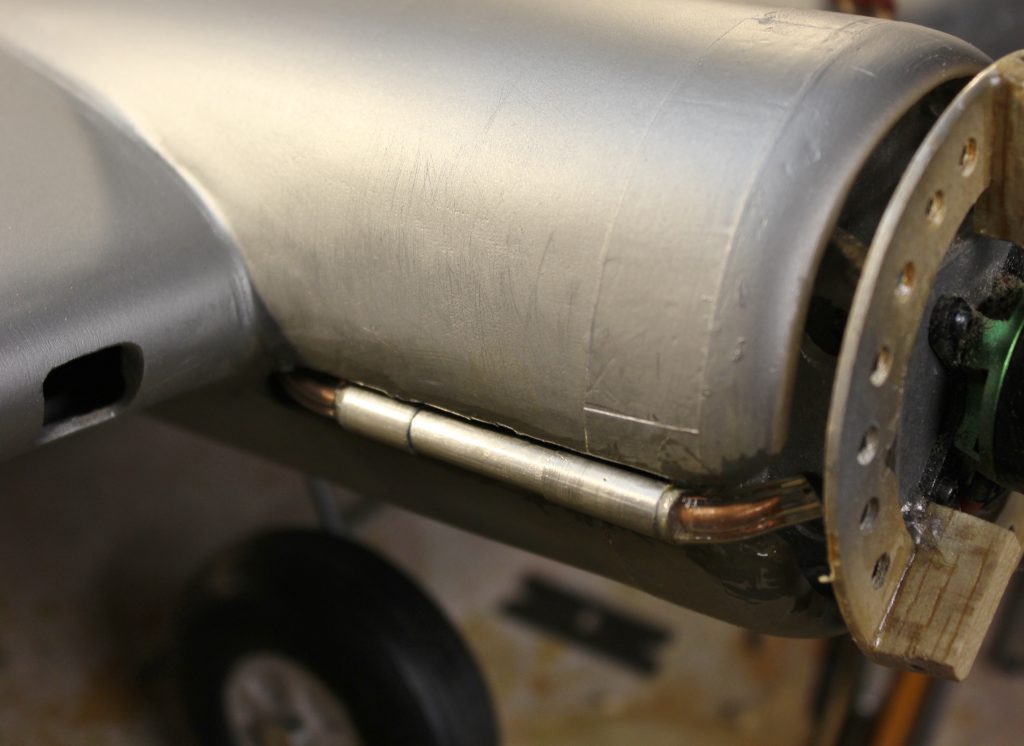
B-17-23-24 Does it make sense now? Installed and ready for finishing the exhaust bypass on the No. 3 nacelle looks like this.
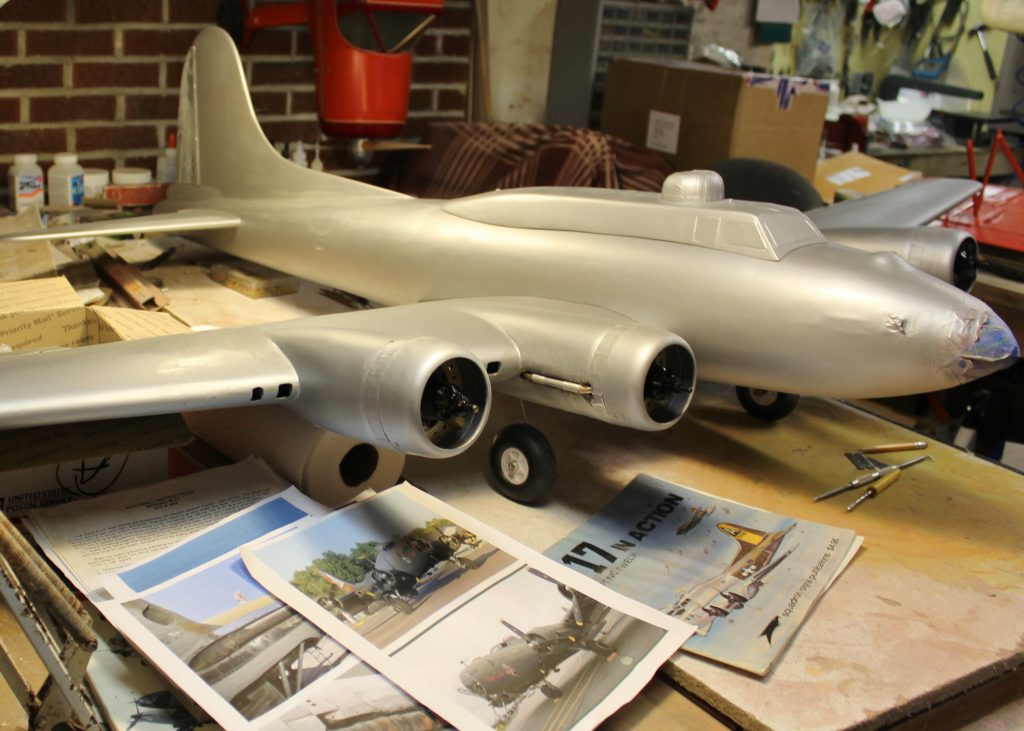
B-17-23-25 Just checking! A preliminary assembly of the whole airplane provides an opportunity to make sure everything fits correctly before I begin work on the color coats.
B-17-23-26 Yes, that’s color you see on the underside of the wing. Because I don’t expect the airplane to spend time in front of scale judges I’m accepting a close approximation of the color you’d expect to see on a B-17F in 1944. This is Stits PolyTone Polar Gray straight out of the can sprayed with my DeVilbiss automotive “touch-up” spray gun.
B-17-23-27 Same deal on the fuselage, which is going to be gray only on the bottom. I’ve let the gray extend far enough past where the color demarcation line will be to assure a safe overlap with the top color.
B-17-23-28 By the same logic I chose Stits PolyTone Olive Drab for that part of the job. NOTE : “Olive Drab” may very well be the most variable “scale color” you will ever encounter. I based my choice on the assumption that this model represents a restored, freshly-painted B-17F that has never been left out in the open long enough to “weather” noticeably, and left it at that. Here you can see what the upper surfaces of the model look like after spraying just enough of that color to cover completely.
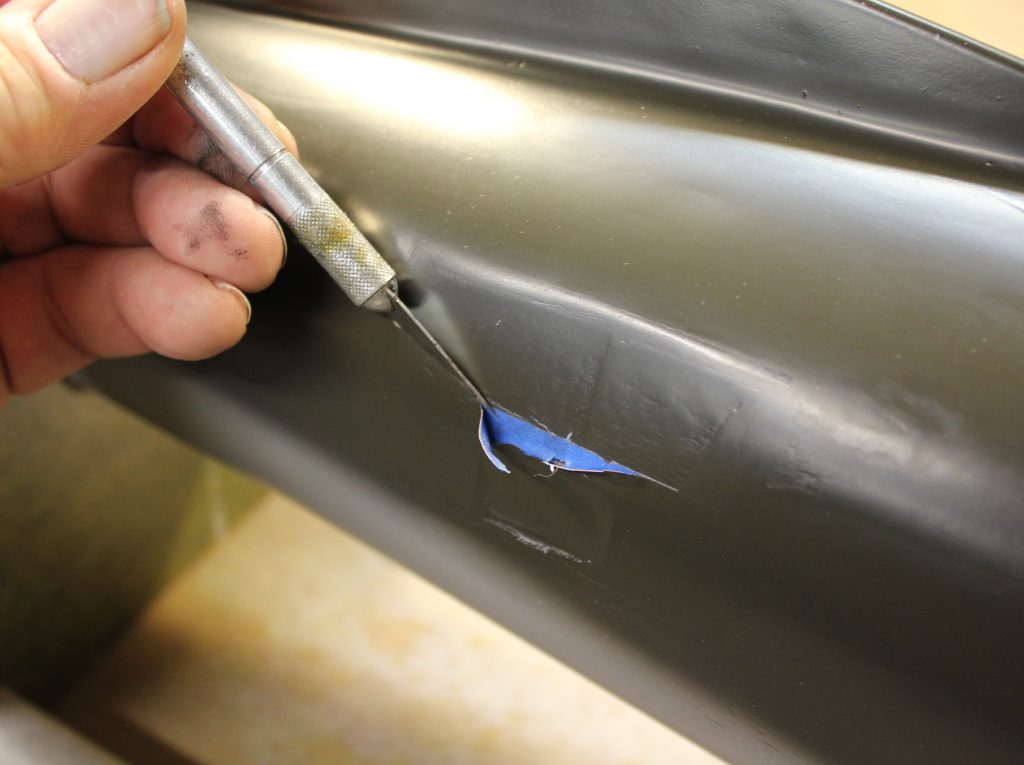
B-17-23-29 Once that top coat of Olive Drab was on, I went away and let the airplane dry for several days, then began to open up all the window openings that were still hidden under lots of masking tape. Here I’m probing carefully with a No. 11 blade to begin separating the tape from the right hand waist gun position.
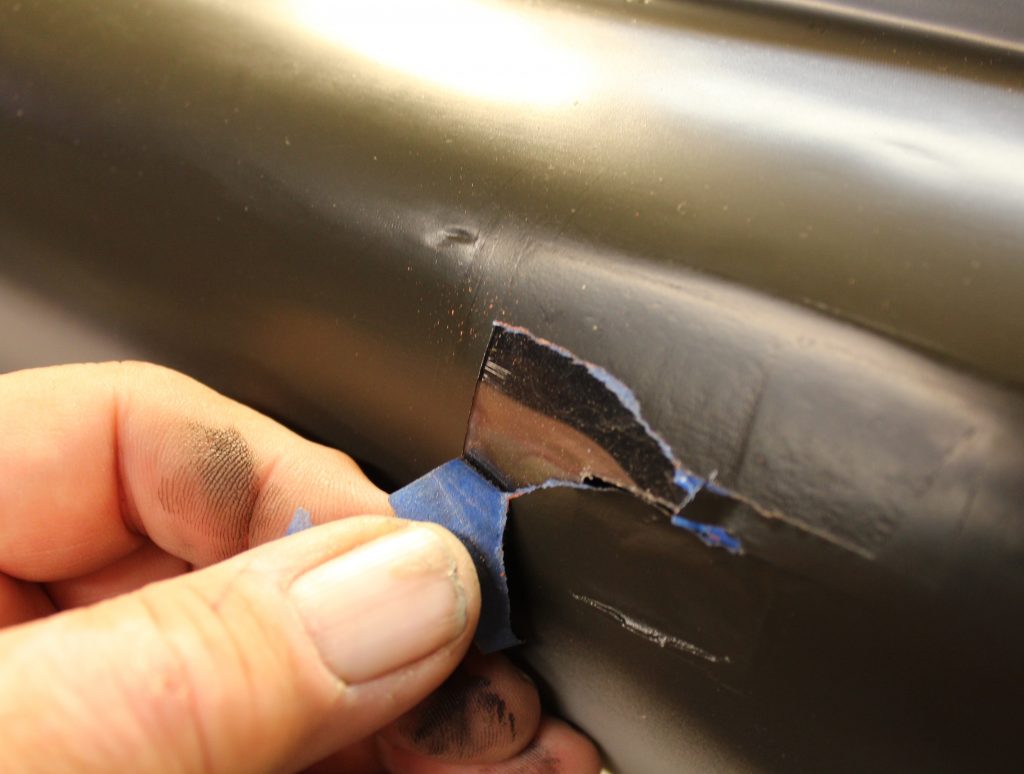
B-17-23-30 You don’t rush this stuff. Even with a top quality finish like Stits PolyTone it’s possible to tear and lift a masked edge if you are careless in removing tape.
B-17-23-31 More of the same, nearly done.
B-17-23-32 All finished…but…can you see that everything is a bit too shiny?
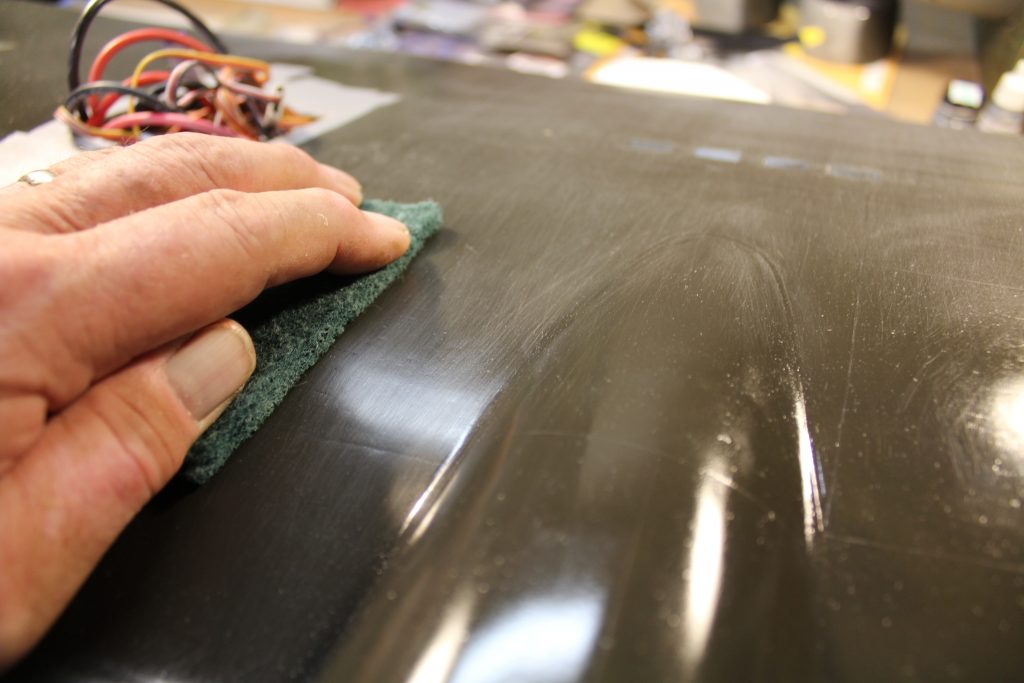
B-17-23-33 What scale aeromodelers call “weathering” starts here. Off camera I applied all the “Pink Lady” markings provided by Callie Graphics (http://callie-graphics.com/) and gave the entire airplane a generous coat of Stits PolyTone Clear with a moderate amount of Stits Flattener added. Again, I let that dry for several days before I began a slow, carefully planned rub-down with medium (green) Scotch Brite pads. The basic rule here is that the abrasive pad nearly always moves in the same direction as the airflow over that particular part of the airplane.
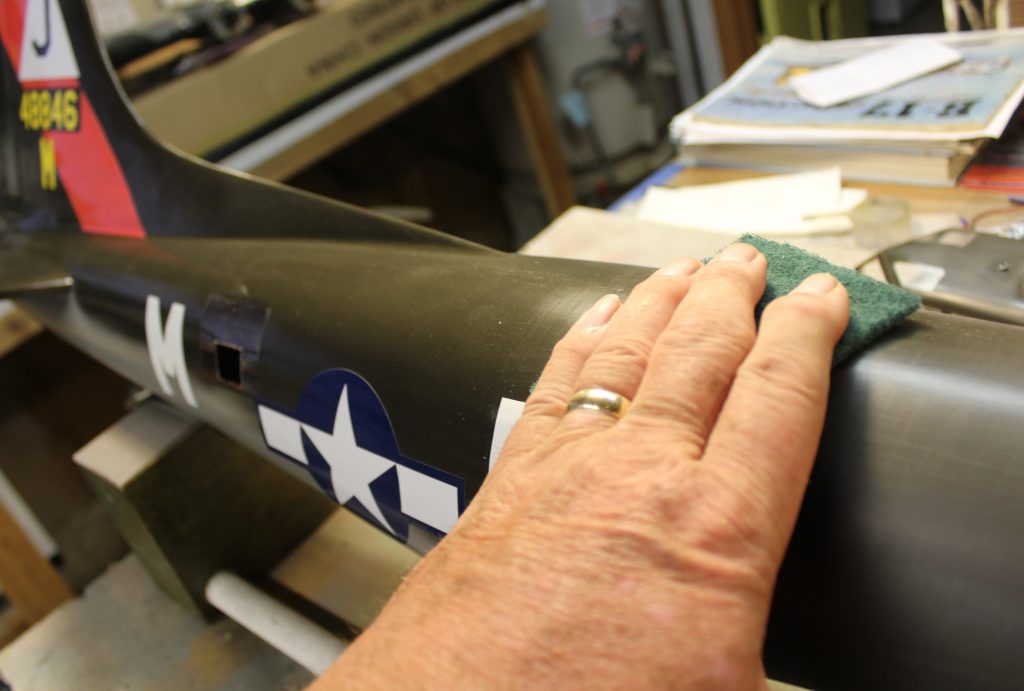
B-17-23-34 More of the same on the fuselage. You can see the beginning of a simulated, slightly dull full scale appearance at the right of my hand. Next time you’ll get to see how the rest of the airplane looks after this basic weathering treatment.
Hi Bob, are you just gunna leave us hanging, or will you finish the story with a maiden flight….. I for one am hanging to know what the finished product looks like.
I have the kit and it’s next on my build list, but I think I will not finish it before starting another as there is so much work in this one, love what you have given us so far, please finish it off !
Pete,
I hear you! Sorry, but there has been a lot of extra stuff going on in life recently. Now I have figured out how to make more time for writing, so you can expect the rest of the B-17 article along with several new topics over the next several weeks.
Bob
That’s great news Bob, I have turned this entire series into a booklet, so I can flick forward and backward at my leisure. I sit with bated breath for the last two articles, again, many thanks for sharing this with us, I love your work !
Hi Bob, hope all is well with you and yours. I much like Pete are anxious to see this build fly. I am considering using your archives as a guide for building my own B17. Love your work.
Thank you Bob for sharing your art.
Wishing you a great 2021.
Dear Bob,
a terrific build series by any standard. But I have looked for 18 months in vain for a final segment beyond no. 23, hoping to see how it all came out. Am I just not finding where it is? Thanks.
Hi Bob,
i have just finished my B17F, and had no nasty surprises with the building of this plane. The only thing was the challenge, to get the CG on the right place. Therefor i had to open
the nose again … and i made the nose removeable. So i can load the LIPOpack direct in front of the B17. I followed your postings about your work on the B 17 and I am rather sure you had / have the same problem with the CG 🙂 ….
Thank you for sharing your art, the pictures and your comments are great!
Greetings from Austria
Walter